
WiFi Device
The WiFi device that travels with the group.
The device rides on the coach or stays with the guide and creates a private listening network for the whole group. The guide starts it step by step in the App, and travelers scan a QR to join.
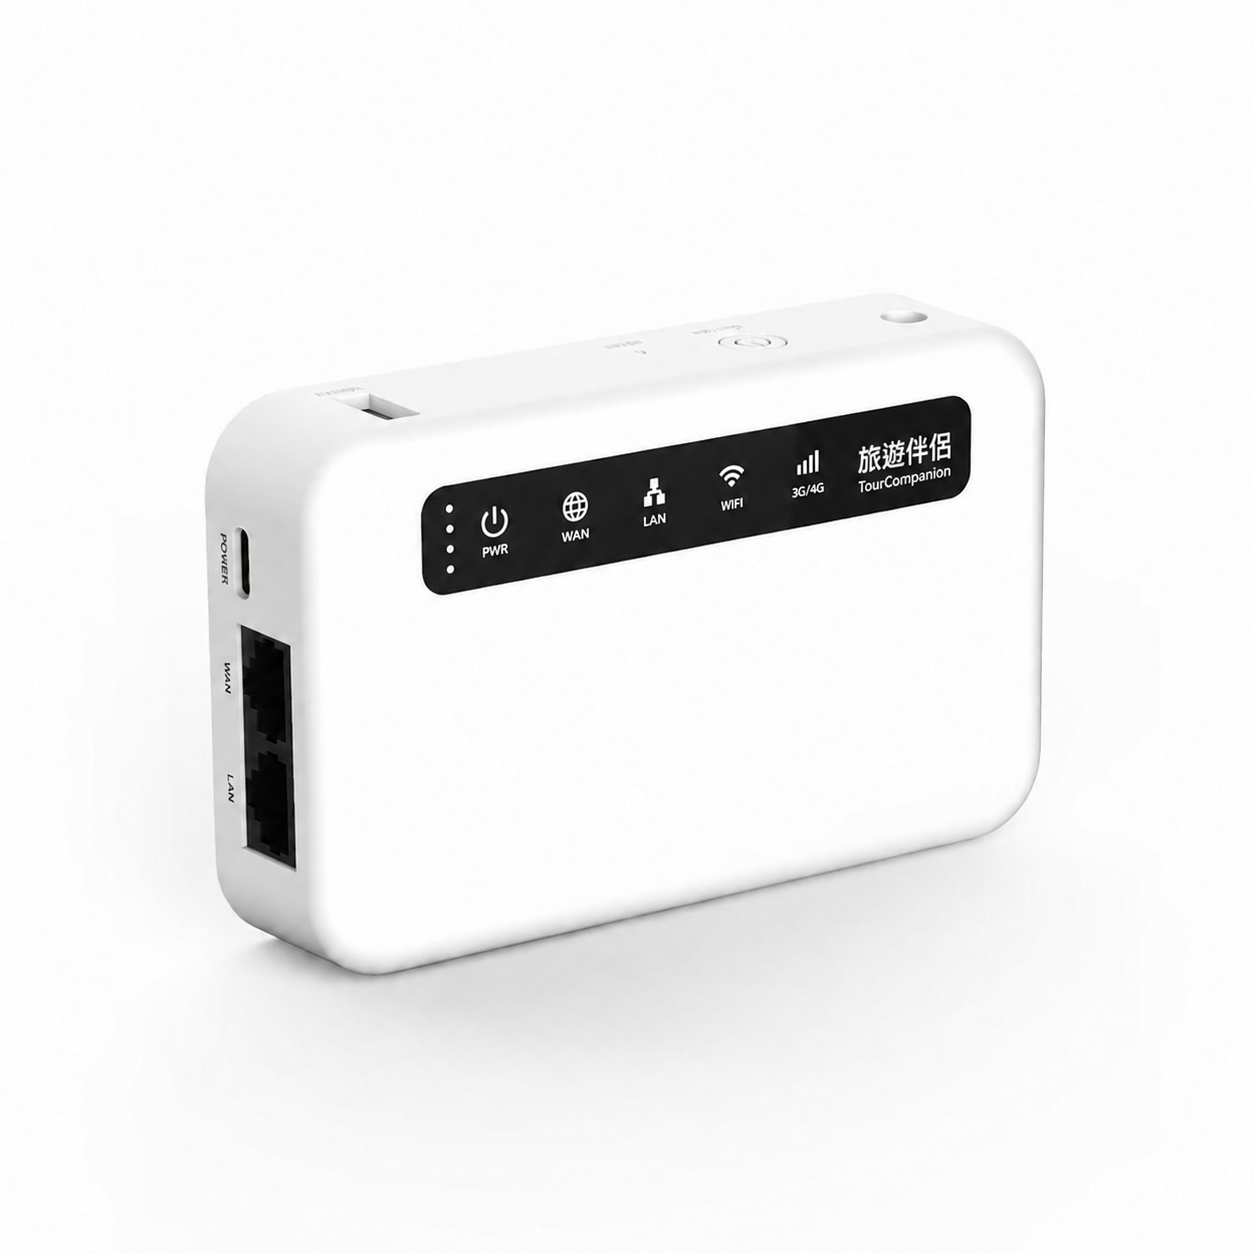
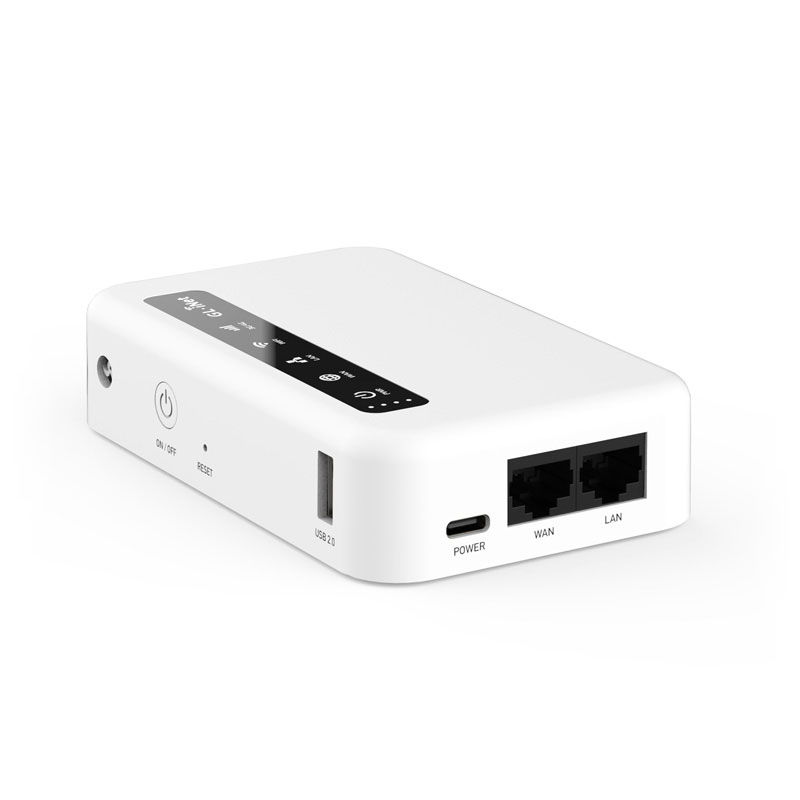
- Indicator lights The body is printed with PWR, WAN, LAN, WiFi and 3G/4G indicators
- Power Marked POWER (USB-C)
- Network ports Marked WAN and LAN
The Device
Get to know the device.
The hardware is the XE300. These are the markings printed on its body.
- Indicator lightsThe body is printed with PWR, WAN, LAN, WiFi and 3G/4G indicators
- PowerMarked POWER (USB-C)
- Network portsMarked WAN and LAN
- Other markingsON/OFF, RESET, USB 2.0
What it does
One tour, one private network.
A private network
Creates a listening WiFi for one tour; travelers join the same network.
No outside network needed
Live commentary travels through the device, so it works without an outside network.
Set up per assigned tour
The guide uses the network of the assigned tour and never types in another tour's details.
A guide's first activation and personal account sign-in still need internet; this is not a fully offline service.
Pairing flow
From switching on to travelers hearing.
This is an overview. The full explanation and limits of each step are in the guide and traveler tutorials in the Learning Center.
Agency prepares
Confirm the guide, the assigned tour and device power, and arrange the network needed for first activation.
Guide connects
The guide connects to the device's WiFi first, then taps “Start device”.
“Start WiFi test version” is not a real activation.
Wait until ready
The App shows “Starting the device”; continue only when it shows “Device is ready”.
“Startup takes about 3 minutes” is an on-screen estimate, not a guarantee.
Show the QR
The guide taps “Show QR code” for the group to scan.
The QR is only for this tour; do not post it publicly.
Travelers join
After scanning, the phone asks to connect to the tour WiFi; once confirmed, the App finds the guide and joins listening.
WiFi showing “No Internet” does not mean a wrong connection.
Status in the App
The screen tells you where you are.
- Starting the device
- Device is ready
- Looking for the guide's session…
- This part has ended / waiting for the guide
These are status texts from the App screens. Follow what the App actually shows; being connected to WiFi is not the same as having joined the commentary.
Before departure
Checklist for agencies and guides.
Confirm guides and assignments
Arrange active Guide activation/account eligibility and the required tour assignments. If there is no active assignment, the agency should resolve it; do not substitute demonstration data.
Prepare devices and phones
Confirm the XE300, power, installed App version, Android permissions, and network arrangements for first-time activation.
Test listening on site first
Use the guide’s device and another traveler’s physical device to confirm joining and audible sound in the intended WiFi environment, distance, and setting.
Arrange traveler support
Explain phone requirements, the correct Live Guide QR, and the no-Internet notice; assign on-site staff to help travelers who are unfamiliar with the process.
When something goes wrong
First work out which stage you are stuck at.
No need to rush into resetting the device or clearing the journey. Pick a situation to see what to check first.
- Trouble scanning or joining with a QR
- Trouble connecting to WiFi
- Connected to WiFi, but no sound
- Guide cannot start
Learning Center
Your first time, step by step.
Complete tutorials, troubleshooting and FAQ live in the Learning Center.
Take Tour Companion
and set off slowly.
Works on iPhone and Android.
Photos are illustrative brand scenery, not real photographs. Trips and names shown are examples.